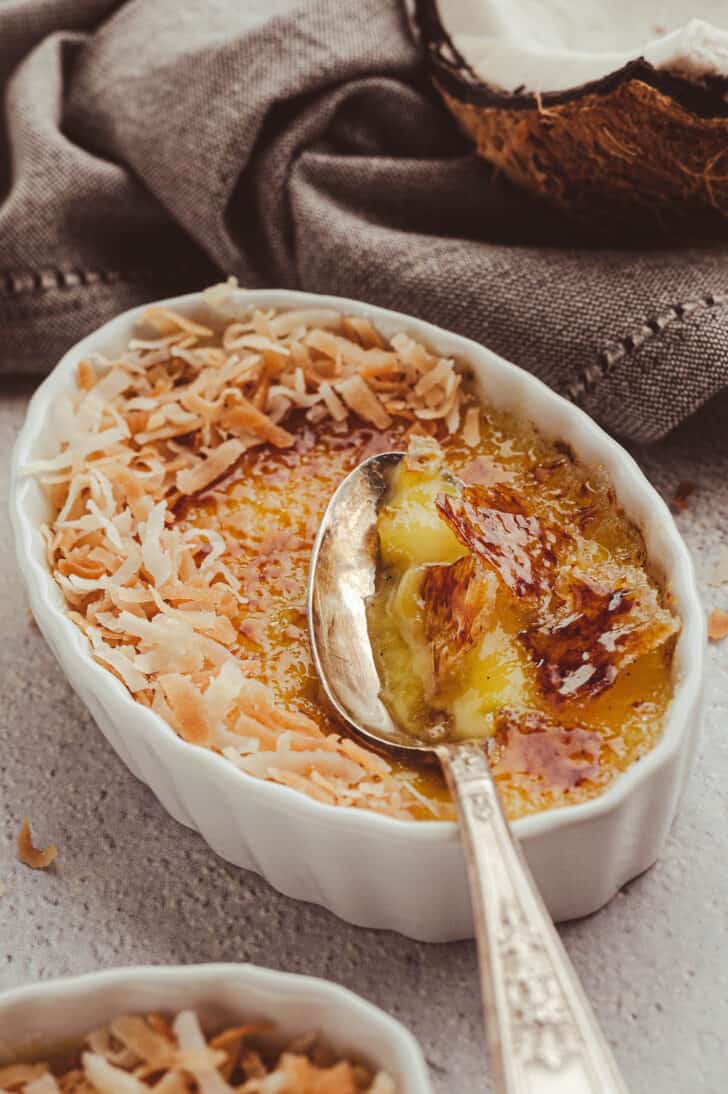
Coconut Creme Brulee
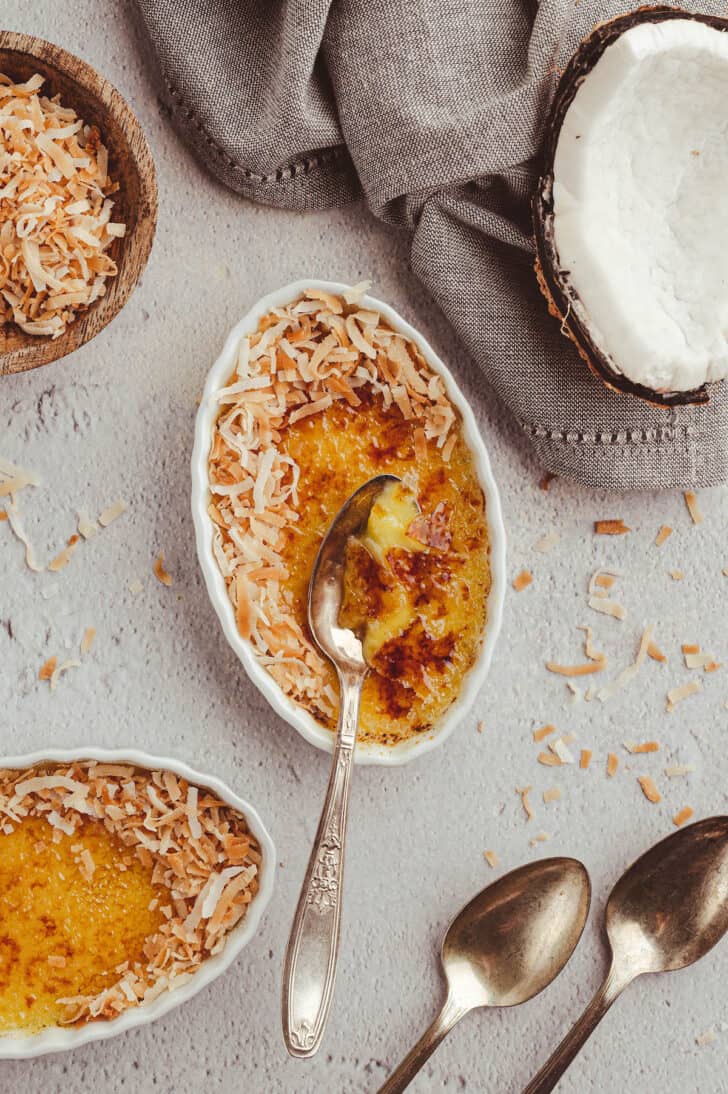
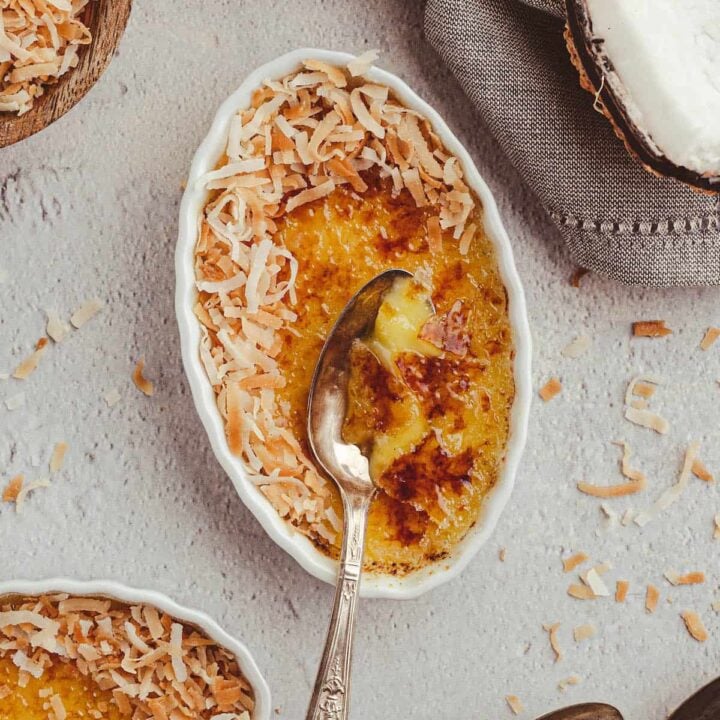
Coconut creme brulee is a decadent custard with a tropical twist. This smooth and cool dessert topped with a perfectly caramelized sugar crust is an amazing way to end a special meal.
Earlier this month, I finally shared my recipe for the 100% classic vanilla bean creme brulee. You can absolutely never go wrong with this dessert, and it’s loved by all ages.
BUT, I also love playing with tradition once in awhile. I’ve been known to whip up creme brulee flavors like grapefruit creme brulee or lemon creme brulee when it’s citrus season, pumpkin creme brulee for Thanksgiving, and even Christmas creme brulee featuring gingerbread spices.
But one thing I haven’t done until now is experiment with the dairy base of the custard. I’ve always used heavy cream for a rich, traditional flavor.
Today, I’m changing things up by combining cream and coconut milk for a tropical twist on this classic dessert. This coconut creme brulee is an amazing way to end a summer meal, or a perfect dessert for Easter.
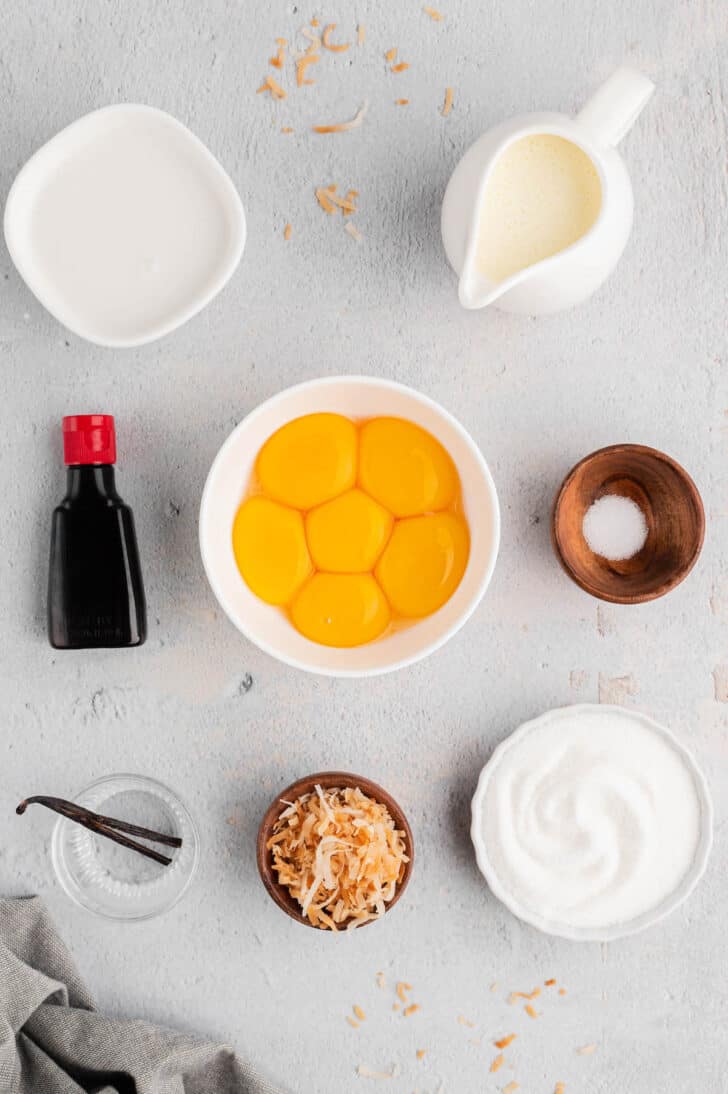
What you’ll need for this coconut creme brulee recipe:
- coconut milk – you want the FULL FAT kind that is sold in cans, NOT the refrigerated coconut milk that’s sold with the other dairy alternatives in the dairy case.
- heavy cream – I also use heavy whipping cream for this recipe so the custard has the appropriate texture, and the coconut flavor isn’t too overwhelming. Cream is also what I use to make my microwave caramel sauce decadent.
- vanilla bean – you’ll be using a half of a vanilla bean for this coconut creme brulee recipe. You may also substitute 1 teaspoon of vanilla extract in place of the vanilla bean.
- coconut extract – this reinforces the flavor of the coconut milk and makes it extra delicious and tropical.
- granulated sugar – you’ll need this for both the custard and for sprinkling on top to torch.
- egg yolks – you’ll need the yolks of 6 large eggs for coconut milk creme brulee. Serious Eats has a bunch of ideas for what to do with leftover egg whites.
- kosher salt – just a pinch. The finished dessert won’t taste salty, but it will taste balanced, just like my chocolate creme brulee.
- toasted sweetened coconut flakes – this is optional, but adding a sprinkle of shredded coconut to the finished dessert adds a special touch. There’s a note on how to easily toast coconut flakes in the recipe card below.
- blowtorch – you can use a specially made kitchen blowtorch, or just one from the hardware store. I use the full size hardware store kind.
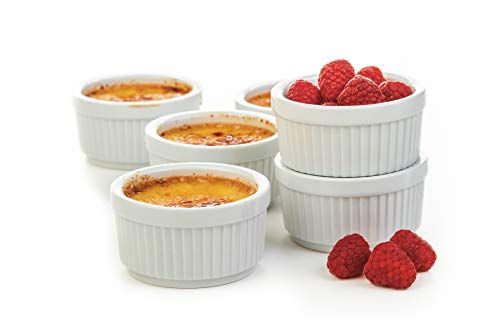
- ramekins or creme brulee dishes – you’ll need six ceramic ramekins or dishes that are oven safe and will hold at least 4 ounces of liquid for this recipe.

Prep the ramekins and roasting pan:
The first step to this coconut milk creme brulee recipe is preheating your oven to 325 degrees F and bringing a tea kettle of water to a boil on the stove.
You will need a roasting pan or a very large baking pan with high sides for this coconut creme brulee recipe. If you have a big pan you break out once a year for baked ham with pineapple sauce, well, now you’ll need to break it out twice a year.
All of the ramekins need to fit onto the bottom of the pan in an even layer.
Once the custard mixture is prepared (more on that below), you will be dividing it between the ramekins. Then, place the roasting pan with the filled ramekins onto a pulled-out oven rack.
Carefully pour boiling water from the kettle into the pan around the ramekins. Be sure not to get any water into any of the custards.
You want to fill the pan with enough water so that the hot water comes up to the halfway point of each ramekin. This hot water bath will allow the custard to cook evenly without cracking.
Once the hot water is poured in, carefully push the oven rack with the roasting pan on it fully into the oven.
A note about ramekin size:
Size DOES matter for creme brulee ramekins. Not only will you need six 4- to 5- ounce ramekins, but you’ll need to pay attention to the shape of them and how it will relate to the baking time for this recipe.
If your ramekins are wide and shallow, your custard may bake a little faster. If your ramekins are narrow and deep, you will likely need to bake your custard longer.
In the photos you see in this post, I’m using wide and shallow ramekins, and my custard took about 26 minutes to bake until it was just set (the middles still trembled slightly, while the custard was set on the outer edges).
If you use narrow and deep ramekins, start at 30 minutes and continue baking, checking every 5 minutes until your custard is just set. It could take up to 45 minutes.
How to work with the vanilla bean:
First, carefully use a sharp paring knife to cut the vanilla bean in half, crosswise. We’ll be using half for this recipe, and you can reserve the other half for another use, like my vanilla beurre blanc shrimp.
Then, split the half vanilla bean right down the middle, lengthwise. Use the tip of the paring knife to scrape as many vanilla bean seeds out of each side of the half pod as possible.
These seeds will go into the cream mixture on the stove as you start the coconut creme brulee custard. You will also throw the two pod halves into the cream mixture, too, to coax out any remaining vanilla beans and lend the custard even more flavor.
The pod pieces will be strained out in the final step of making the custard.
How to make the custard for coconut creme brulee:
In a small saucepan, combine the coconut milk, cream, and the vanilla beans you scraped out of the pod, along with the pod itself.
Heat this over medium heat until the cream just starts to bubble around the edges of the pan. Watch it carefully, because you don’t want the mixture to come to a full rolling boil.
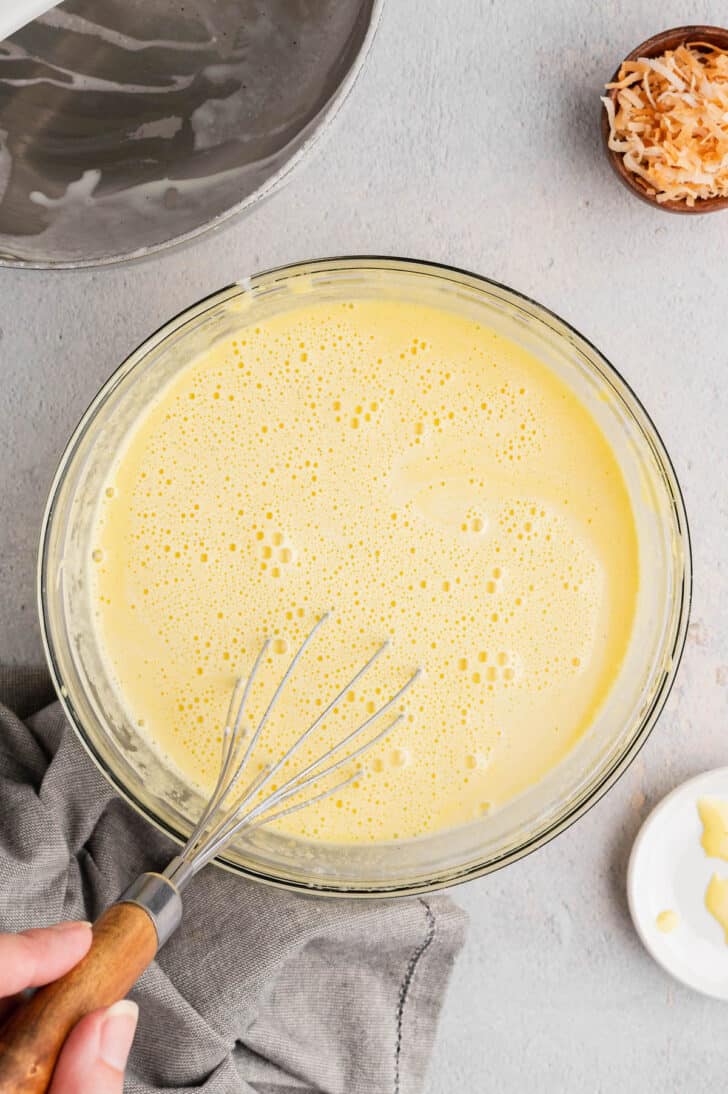
While you’re keeping one eye on the cream, grab a large bowl and whisk together the egg yolks, sugar and salt.
Once the cream mixture starts to bubble, turn off the heat and stir in the coconut extract. Then, grab a ladle and slowly add 4 ladles of the hot cream mixture to the egg mixture while whisking constantly.
Then, whisk the remaining cream into the egg mixture while continuing to whisk.
Strain the mixture through a fine-mesh strainer set over a large liquid measuring cup. Don’t skip this step! Just like with my apple rose tart, it’s important to ensure the smoothest, creamiest final product.
Then, divide the strained coconut creme brulee mixture between the ramekins in the roasting pan.
Bake the custards 25 to 30 minutes or until they are JUST set. Gently shake one of the ramekins, and the custard should tremble slightly in the middle but be set on the outer edges.
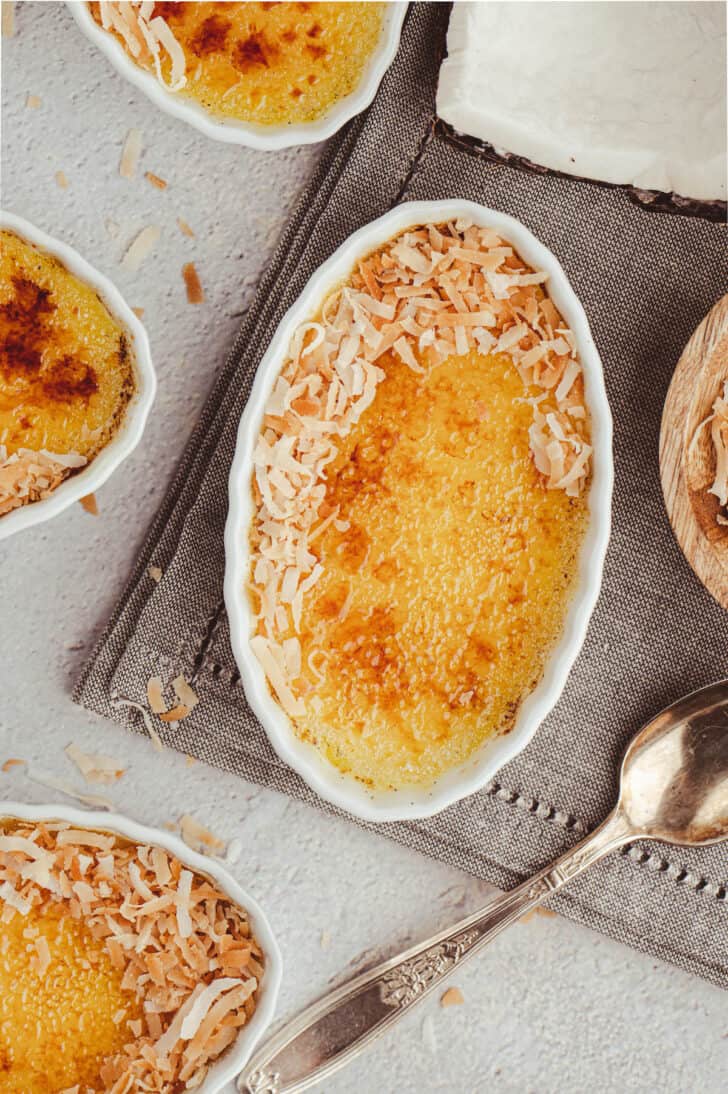
Some tips for torching the coconut milk creme brulee:
First of all, you want to be sure to get an EVEN layer of sugar across the surface of each custard.
I sprinkle the tablespoon of sugar across the custard as evenly as I can, and then I kind of tilt and shake and shimmy the ramekin until it’s even more evened out.
Once you start torching the sugar, it’s important to remember to keep the torch moving constantly so none of the areas burn.
Personally, I’ve found it easiest to brown the sugar of the coconut milk creme brulee in stages. Meaning, first I torch the entire surface of the sugar until it is light golden brown.
And then I go back and keep torching until everything is medium golden brown. And then again until it’s all dark golden brown.
As soon as you start to smell any sugar burning, stop torching immediately. Dark brown sugar is delicious, but burnt sugar is just bitter.
Can you freeze creme brulee?
If you can’t eat all 6 servings right away, coconut milk creme brulee is able to be frozen!
To freeze, complete the recipe through Step 5, but instead of transferring to the refrigerator, wrap and transfer to the freezer instead. It’s best if you put the wrapped ramekins in a freezer bag, as well.
Like my shortbread thumbprint cookies, the custards should keep about 3 months in the freezer.
When ready to serve, thaw in the refrigerator for about 4 to 6 hours, and then sprinkle the tops of the coconut creme brulee with sugar and torch just before serving.
If you love freezer friendly recipes like this coconut brulee recipe, be sure to check out my egg muffins recipe, vegetables lasagna and cottage cheese lasagna.
Coconut Creme Brulee
Coconut creme brulee is a decadent custard with a tropical twist. This smooth and cool dessert topped with a perfectly caramelized sugar crust is an amazing way to end a special meal.
Ingredients
For the Custard:
- 1/2 vanilla bean, split and scraped
- 1 cup full fat canned coconut milk
- 1 cup heavy cream
- 1 teaspoon coconut extract
- 6 large egg yolks
- 1/3 cup granulated sugar
- Pinch of kosher salt
For Serving:
- 6 tablespoons granulated sugar
- Toasted sweetened coconut flakes (see Home Chef Tips below), for garnish (optional)
Instructions
- Make the Custard: Preheat oven to 325 degrees F; heat large kettle of water to boiling. Place six 4- to 5-ounce ramekins (see Home Chef Tips below) in roasting pan.
- In small saucepan, heat vanilla bean and it's scrapings, coconut milk and heavy cream over medium heat 4 to 6 minutes until cream just starts to bubble around edges of pan (do not bring to a full boil). Remove from heat and stir in coconut extract.
- Meanwhile, in large bowl, whisk egg yolks, sugar and salt until well combined. While whisking, use ladle to slowly add 4 ladlefuls of hot cream mixture to egg mixture. Gradually whisk in remaining cream mixture. Strain through fine mesh strainer into large liquid measuring cup.
- Divide custard mixture between ramekins; place roasting pan in oven. Add enough boiling water to come halfway up sides of the ramekins. Bake 25 to 30 minutes or until custards are just set (they should tremble slightly in the middle, but be set on outer edges).
- Use tongs or pancake turner to carefully transfer ramekins to cooling rack; let stand 30 minutes. Cover with plastic wrap and chill at least 4 hours or up to 2 days before serving.
- To serve, sprinkle 1 tablespoon sugar over each custard. Using blowtorch, caramelize top of each custard until sugar bubbles and turns brown (this can also be done under a broiler). Garnish with coconut flakes, if using, and serve immediately.
Notes
Home Chef Tips:
- To make toasted coconut flakes, place 1/2 cup sweetened coconut flakes on microwave safe plate and microwave on HIGH 1 minute. Carefully stir coconut and continue microwaving on high in 30 second increments, stirring ever 30 seconds until coconut is golden brown.
- You may substitute 1 teaspoon vanilla extract in place of the vanilla bean.
- If your ramekins are wide and shallow, your custard may bake a little faster. If your ramekins are narrow and deep, you will likely need to bake your custard longer.In the photos you see in this post, I'm using wide and shallow ramekins, and my custard took about 26 minutes to bake until it was just set. If you use narrow and deep ramekins, start at 30 minutes and continue baking, checking every 5 minutes until your custard is just set. It could take up to 45 minutes.
Recommended Products
Foxes Love Lemons, LLC is a participant in the Amazon Services LLC Associates Program, an affiliate advertising program designed to provide a means for sites to earn advertising fees by advertising and links to Amazon.com. There is no additional cost to you.


Nutrition Information:
Yield: 6 Serving Size: 1Amount Per Serving: Calories: 382Total Fat: 28gSaturated Fat: 18gTrans Fat: 1gUnsaturated Fat: 8gCholesterol: 262mgSodium: 95mgCarbohydrates: 26gFiber: 0gSugar: 25gProtein: 9g
This website provides estimated nutrition information as a courtesy only. You should calculate the nutritional information with the actual ingredients used in your recipe using your preferred nutrition calculator.

OMG! I was looking for a dessert to take to a friend’s house tonight. She and hubby are making Thai food. I looked at Thai desserts (mostly rice-based) and I simply wasn’t interested. I started thinking about tropical things like coconut, vanilla, ginger and mango and then I found your website. I made the custard although I added sliced fresh ginger to the cream/coconut milk while heating it. I tasted one of them right out of the oven and I think you are a genius! It is sooooo smooth and tropical-tasting. I mixed some powdered ginger into the sugar and will test it on the one I tasted. I’m hoping the ginger doesn’t burn. In that case, I’ll just use sugar by itself. This is a keeper! Thank you.
I’m so glad to hear this, Marilyn. I LOVE the addition of ginger. I am going to have to try that myself. And such a great idea to pair this with Thai food. Yum!
They loved it last night. I tried the sugar/powdered ginger test on one of them (the recipe makes 6 so I could sacrifice 2 for experiments) but the ginger was too intense. I used plain granulated sugar and it was perfect.
Great to know! Thanks Marilyn!